aisuite.run. This document is generated from the live handbook, so what it says is what the site said on the day it was saved.
Start here
What AI Suite is, what it makes, and what to expect the first time you press a button.
AI Suite is one place to make pictures, video and music.
You describe what you want, or you hand it something you already have, and it
gives you back a finished file you can download and use. There is nothing to
install and nothing to set up. If you can fill in a form, you can use every
tool in here.
You buy time, not credits. Your balance is hours and minutes. It goes down
while the work is being made and stops when it stops. There is no price per
press and nothing to convert in your head. How that works.
Nothing is charged until it works. If a run fails, it costs you nothing,
however long it ran for.
You can ask for several versions at once. Most people do. The first thing
you write rarely gives the best result, and four attempts side by side beat one
attempt four times.
Everything you make is yours. We claim no ownership of your prompts, your
uploads, or anything the console returns, and your work is never used to train
anything.
If you want the whole thing on one page, to read straight through or to search
every page at the same time, open the whole handbook. It is every
page in the order they appear in the sidebar.
Before anything runs, the button tells you two things: roughly how long it
will take, and what it will cost in time from your balance.
That estimate is not a guess. It is measured from real runs of the exact
settings you have chosen, so it gets more accurate the more that setup is
used. Change the size or the length and the estimate changes with it.
You are never charged more than the quote
If the work runs longer than the estimate, you pay the estimate. The overrun
is ours.
The two video pages carry a Process faster switch, and it changes the cost
of a run more than any other control on the screen.
Leave it on while you are finding the shot: quicker, cheaper, good enough
to judge an idea by. Turn it off for the take you are going to publish. The
button shows you both prices before you press, so the decision is never blind.
Most tools let you ask for several results from one press. This is the single
biggest difference between people who get good results and people who do not.
Ask for four, look at them together, keep the one that works. How many you can
ask for at once depends on your plan, from two up to twenty.
It failed. You are not charged. Press again. Most failures are momentary.
It is taking longer than the estimate. You are still only charged the
estimate. You can cancel from the job list; a cancelled run costs the time it
actually used.
The result is not what you wanted. That is normal and it is not a fault.
Change one thing in the prompt and run it again. The tool pages in this
handbook each end with the changes that make the most difference.
There are rules, and the console enforces them rather than trusting everybody
to read them. It will refuse work that is illegal, sexual material involving
minors in any form, anything built to impersonate a real person in order to
deceive, and material aimed at harassing someone. A refused run costs nothing.
What it costs
You buy time, not credits. What that means in practice, and the four promises that come with it.
Most tools of this kind sell you credits or tokens, and then make you work out
what a credit buys. This one sells you time.
Your balance is hours, minutes and seconds. It goes down while a machine is
actually making something of yours, and it stops when that stops. That is the
whole model.
A credit is a made-up unit whose value changes depending on what you ask for. A
minute is a minute. When you look at your balance you are looking at the same
thing the machine is measuring, so there is nothing to convert and nothing that
can quietly get more expensive.
Music & Song is sold at a fixed price per song rather than by the second.
You are told the price before you press, and that is what a finished song
costs, whether it took forty seconds or nine minutes.
The four promises still hold: nothing is held when you press, a song that fails
costs nothing, you are never charged more than the price you were shown, and
queueing is still free. A song you cancel part-way costs the time it actually
used, never more than the price.
Your time stays. Nothing on your balance is removed when a period ends.
What stops is the plan's allowances: video and multiple versions per press go
until you renew. Time already on your balance can still be spent on the rest,
one at a time.
Text to image
Describe a picture in a sentence and get it back, in whatever shape you need.
A sentence in, pictures out. The one most people start with.
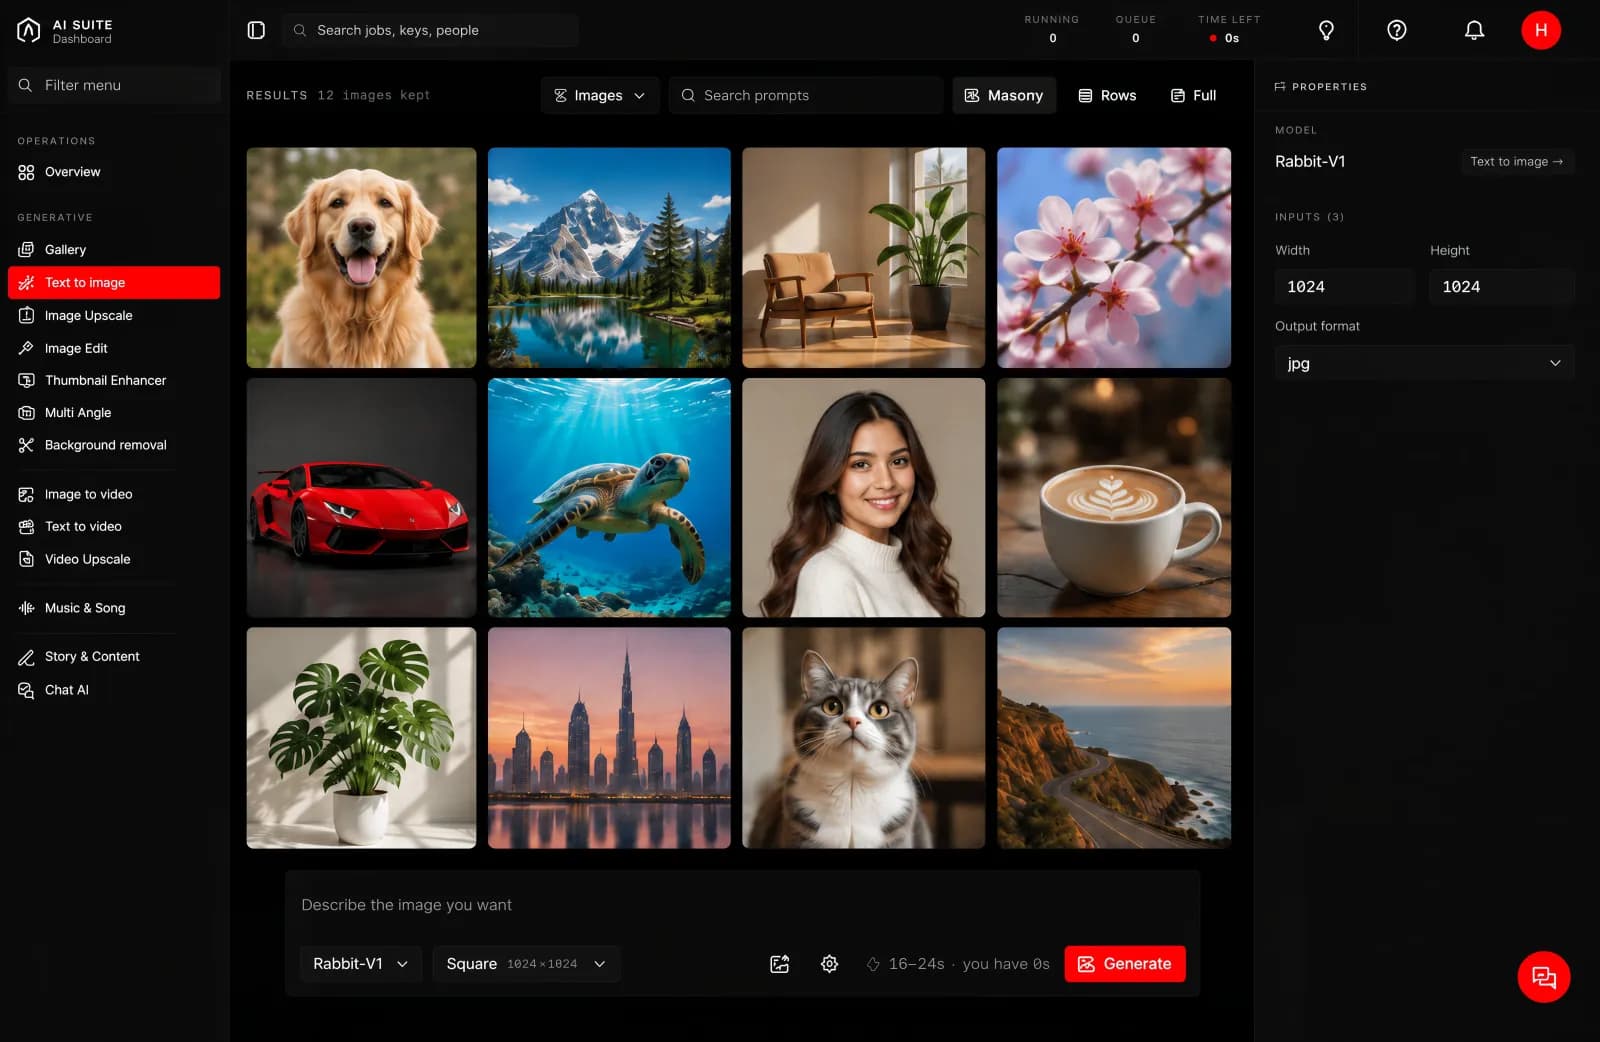
The Text to image page. The prompt box is the large field; the model, the size and how many versions to make sit beside it, and the button quotes you before you press.
Making a picture that does not exist yet. Product shots, backgrounds, mock-ups
for a pitch, artwork for a post, a stand-in image while you wait for a real
photograph.
Two things decide how long a run takes, and both are yours to choose:
A larger picture takes longer than a smaller one.
A longer clip takes longer than a shorter one.
That is the whole rule, and it holds for every tool in the console. The button
quotes you before you press, so you never have to work it out yourself. Change
the size or the length and watch the estimate move.
Seconds rather than minutes for a single picture. The button quotes you before
you press, and the quote is measured from real runs at the settings you chose.
Text inside a picture is unreliable. Any tool of this kind will get a word
on a shop sign wrong more often than right. Add the words afterwards in a
design tool.
Hands, crowds and reflections are the usual weak spots. Ask for a
composition that avoids them, or generate a few versions and pick.
The same sentence gives a different picture each time. That is the tool
working, not failing. If you want a specific one back, keep it in the gallery.
Change one thing at a time. If it is close but the light is wrong, only change
the light. Rewriting the whole sentence gives you a new picture rather than a
better version of the one you liked.
Words that reliably change the result:
The camera. "Close-up", "wide shot", "from below", "long lens".
The light. "Morning light", "studio lighting", "backlit", "overcast".
The finish. "Photograph", "illustration", "flat colour", "film grain".
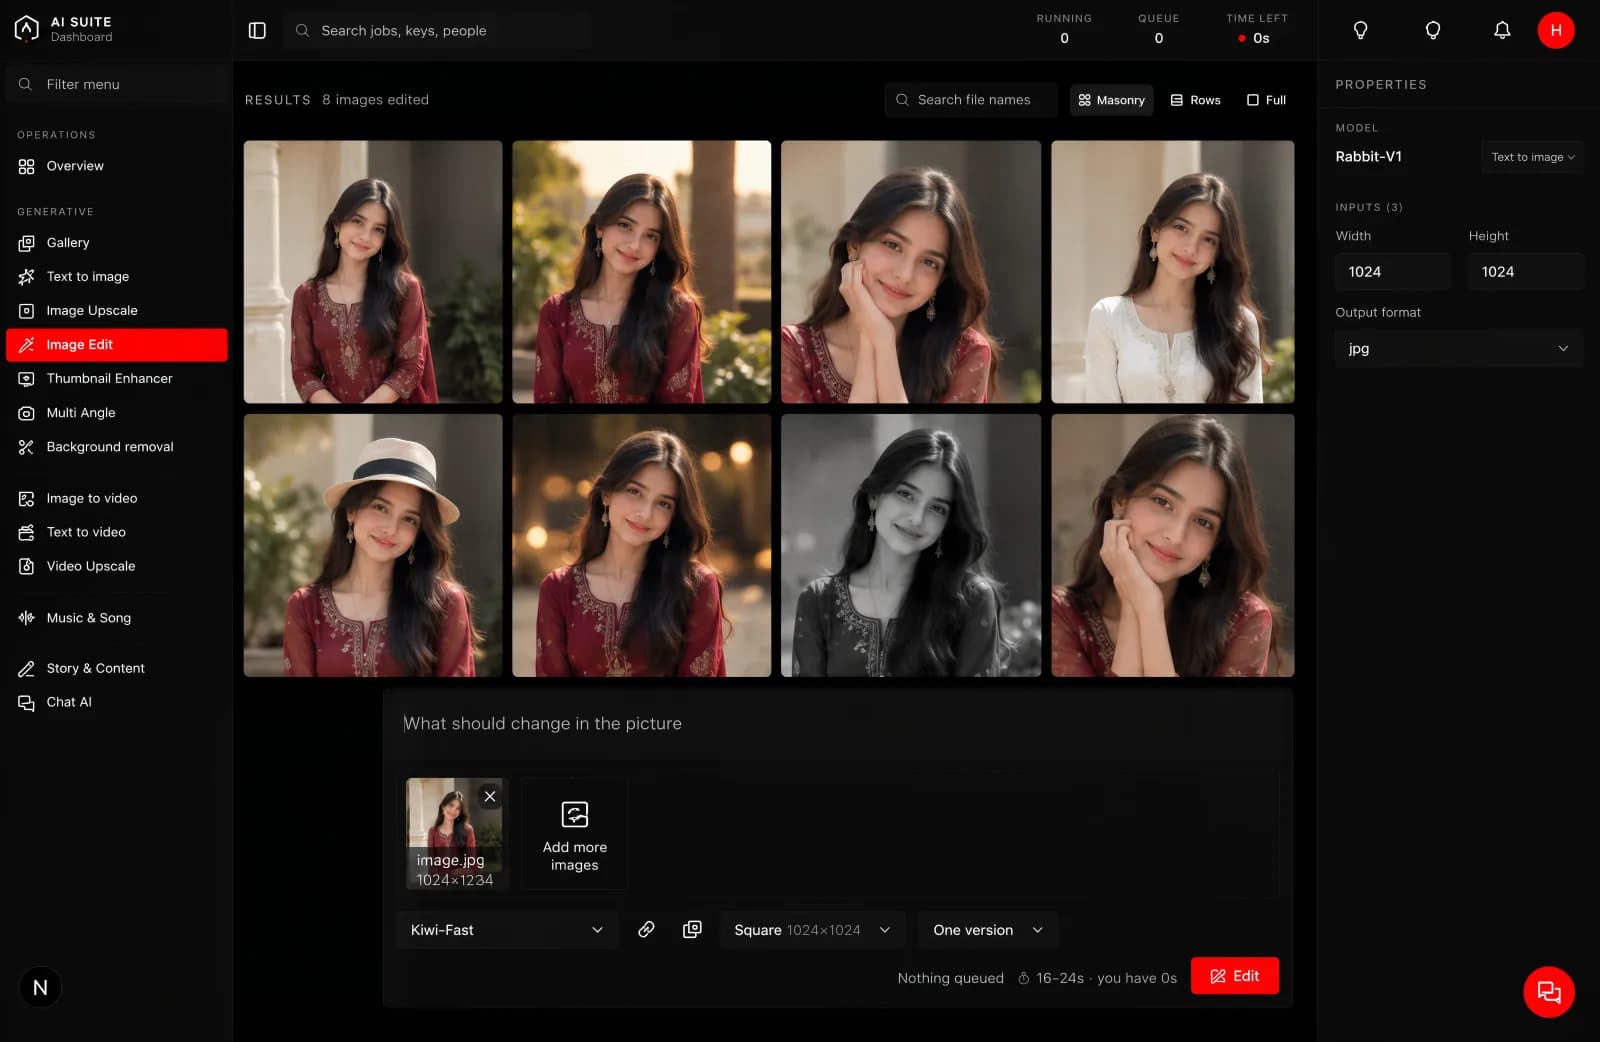
Changing something in a picture you already have without opening an editor.
Swapping a background, changing a colour, removing something, adding something,
or restyling the whole frame.
Two, and they do the same job. The difference is how many pictures you can
hand in at once.
Model
Pictures it takes
Kiwi-Fast
Up to four
Pineapple-Fast
Up to three
Both take your instruction and the shape you want back. If you are editing one
picture, either will do. Start with Kiwi-Fast and try the other if the result
is not what you wanted. They read the same instruction differently, which is
worth knowing when one of them refuses to do what you asked.
Two things decide how long a run takes, and both are yours to choose:
A larger picture takes longer than a smaller one.
A longer clip takes longer than a shorter one.
That is the whole rule, and it holds for every tool in the console. The button
quotes you before you press, so you never have to work it out yourself. Change
the size or the length and watch the estimate move.
It rebuilds the picture rather than painting over it. Small details away
from your instruction can shift slightly. For a change that must not touch
anything else, a traditional editor is still the better tool.
One instruction at a time works better than five. Run it twice rather than
asking for everything at once.
Faces and logos are where small shifts are most noticeable. Check those
before you publish.
Be specific about what stays. "Change the background to a studio backdrop, keep
the product exactly as it is" gives a better result than "studio background".
Background removal
A clean cut-out with a transparent background, in one press.
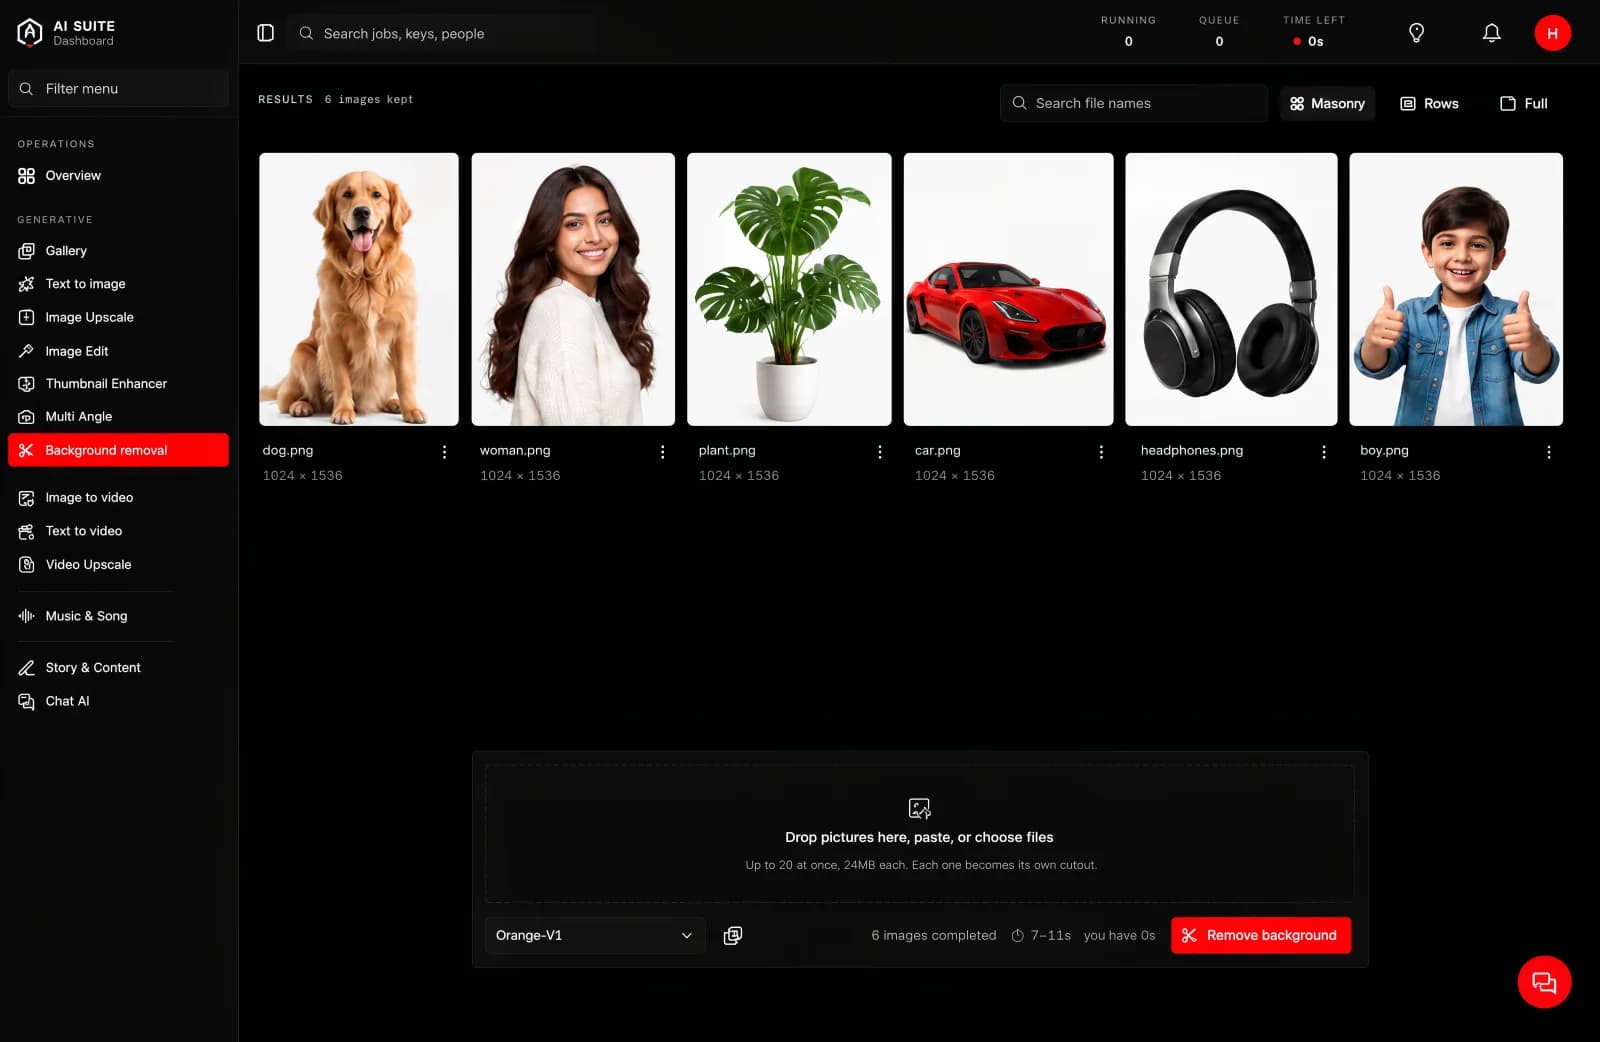
A picture in, a cut-out out.
The Background removal page. One picture, one button, nothing to configure.
Two things decide how long a run takes, and both are yours to choose:
A larger picture takes longer than a smaller one.
A longer clip takes longer than a shorter one.
That is the whole rule, and it holds for every tool in the console. The button
quotes you before you press, so you never have to work it out yourself. Change
the size or the length and watch the estimate move.
Hair, fur and glass are the hard cases for every tool that does this. Check
the edges before using it somewhere prominent.
Keep the original. If you later want a different crop or a softer edge, you
want the full picture, not the cut-out.
The result has a transparent background, which means it will look like it has
a chequerboard behind it in some viewers. That is the transparency, not a
fault.
A subject that is clearly separated from its background cuts out better. If you
are making the source picture yourself with
Text to image, ask for a plain or blurred
background and the cut-out will be cleaner.
Image Upscale
Make a picture bigger without it going soft.
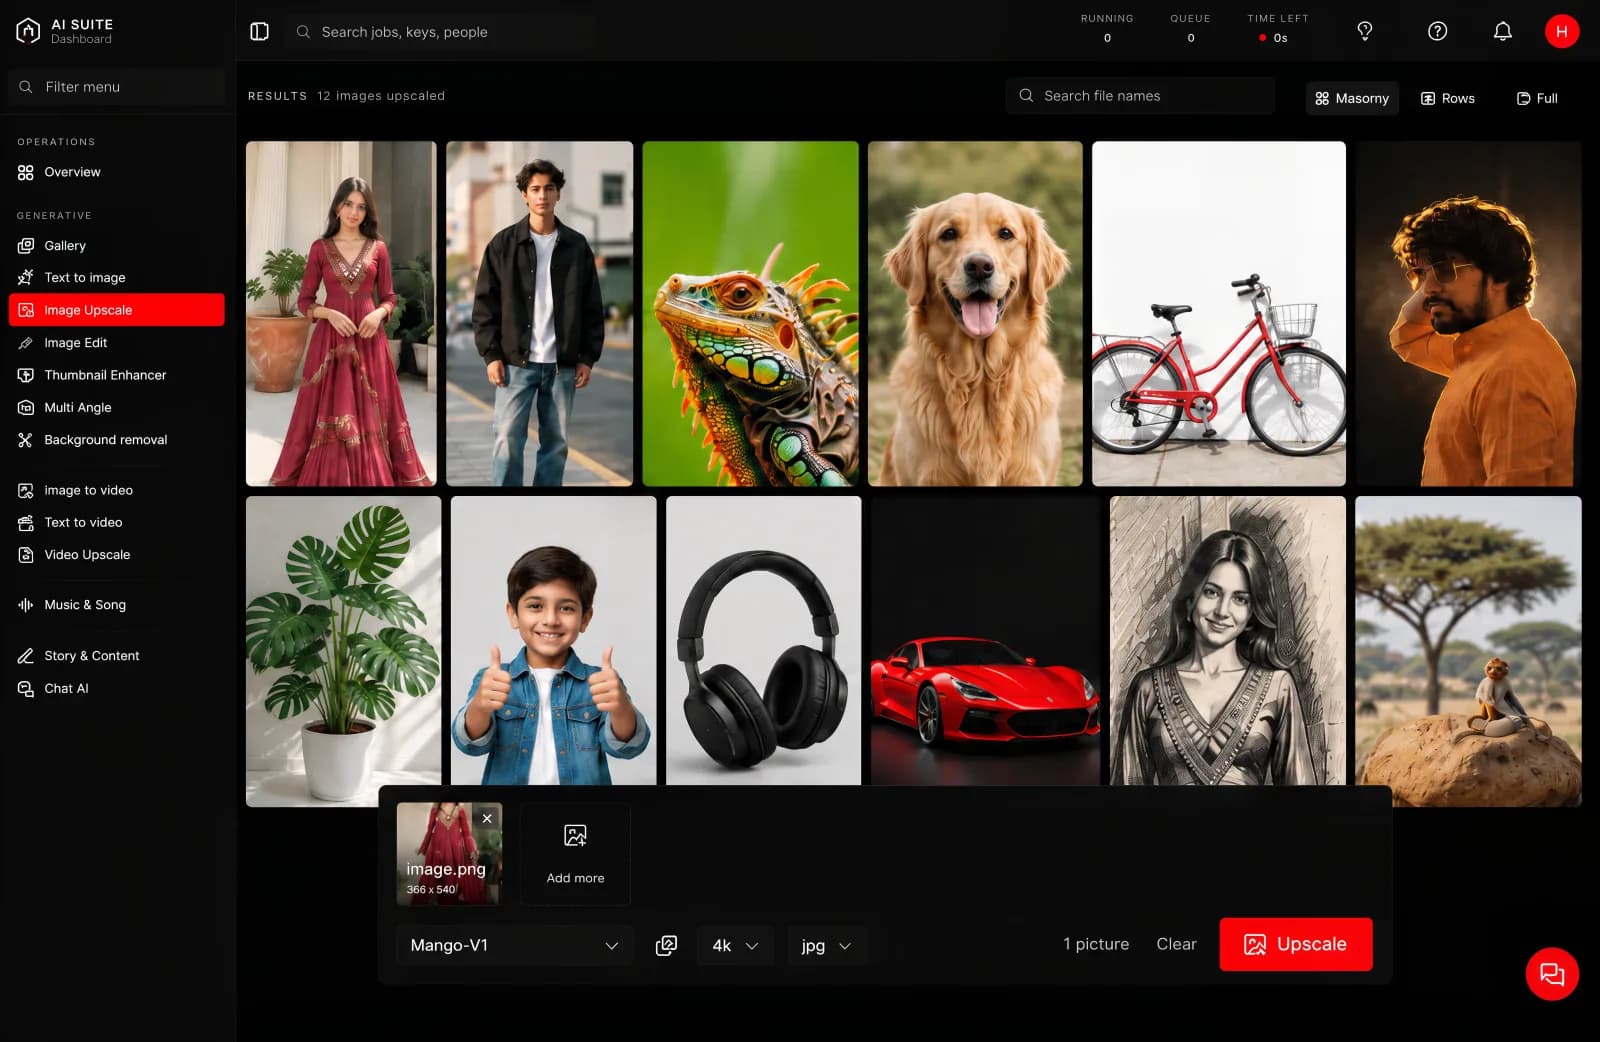
A picture in, a larger picture out.
The Image Upscale page. The picture, and how much larger you want it.
Getting a small picture up to a size you can print, put on a billboard, or use
full-width on a screen. Also useful for rescuing an old photograph or a
low-resolution logo.
Two things decide how long a run takes, and both are yours to choose:
A larger picture takes longer than a smaller one.
A longer clip takes longer than a shorter one.
That is the whole rule, and it holds for every tool in the console. The button
quotes you before you press, so you never have to work it out yourself. Change
the size or the length and watch the estimate move.
The scale is the thing to watch here: it is the setting that moves the estimate
most on this page.
It rebuilds detail, it does not invent facts. Text that was unreadable in
the original will come back sharp but still wrong. A face too small to make
out will come back as a face, not necessarily that person's face.
Start from the best copy you have. Upscaling a screenshot of a photograph
gives a worse result than upscaling the photograph.
Bigger is not always better. Going far beyond what the original holds gives
a clean but plasticky look.
Use it last. Crop, edit and choose first, then upscale the one you are keeping.
It is the most expensive step and there is no reason to spend it on versions you
will throw away.
Multi Angle
One photograph, the same scene from sixteen cameras.
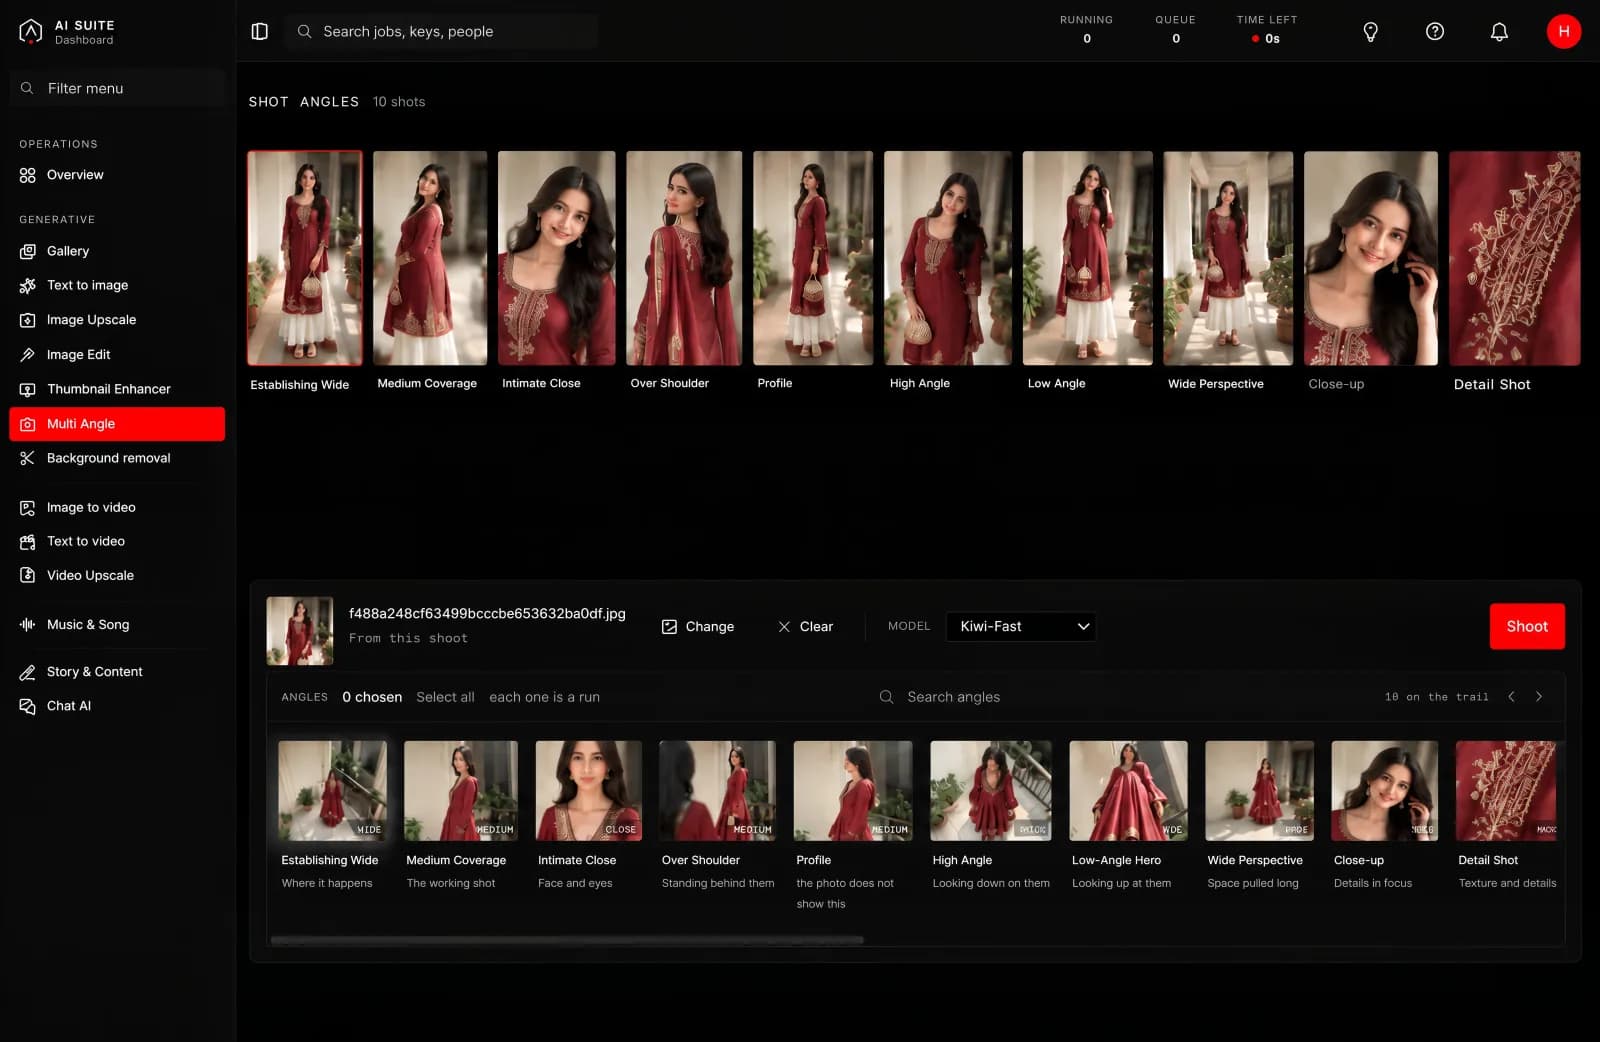
One picture in, the same subject from several camera positions out.
The Multi Angle page. One picture in, and the angles you want ticked from the sixteen.
Getting coverage from a single shot. A product from every side for a listing, a
scene from several angles for a storyboard, a set of options when you only had
budget for one photograph.
One picture, and which angles you want. The angles are named for what a camera
operator would call them: overhead, low angle, wide establishing, extreme
close-up, following behind, and so on.
A set of pictures of the same subject, each from a different position, in the
shape that angle calls for. A wide establishing shot comes back wide; a portrait
angle comes back tall.
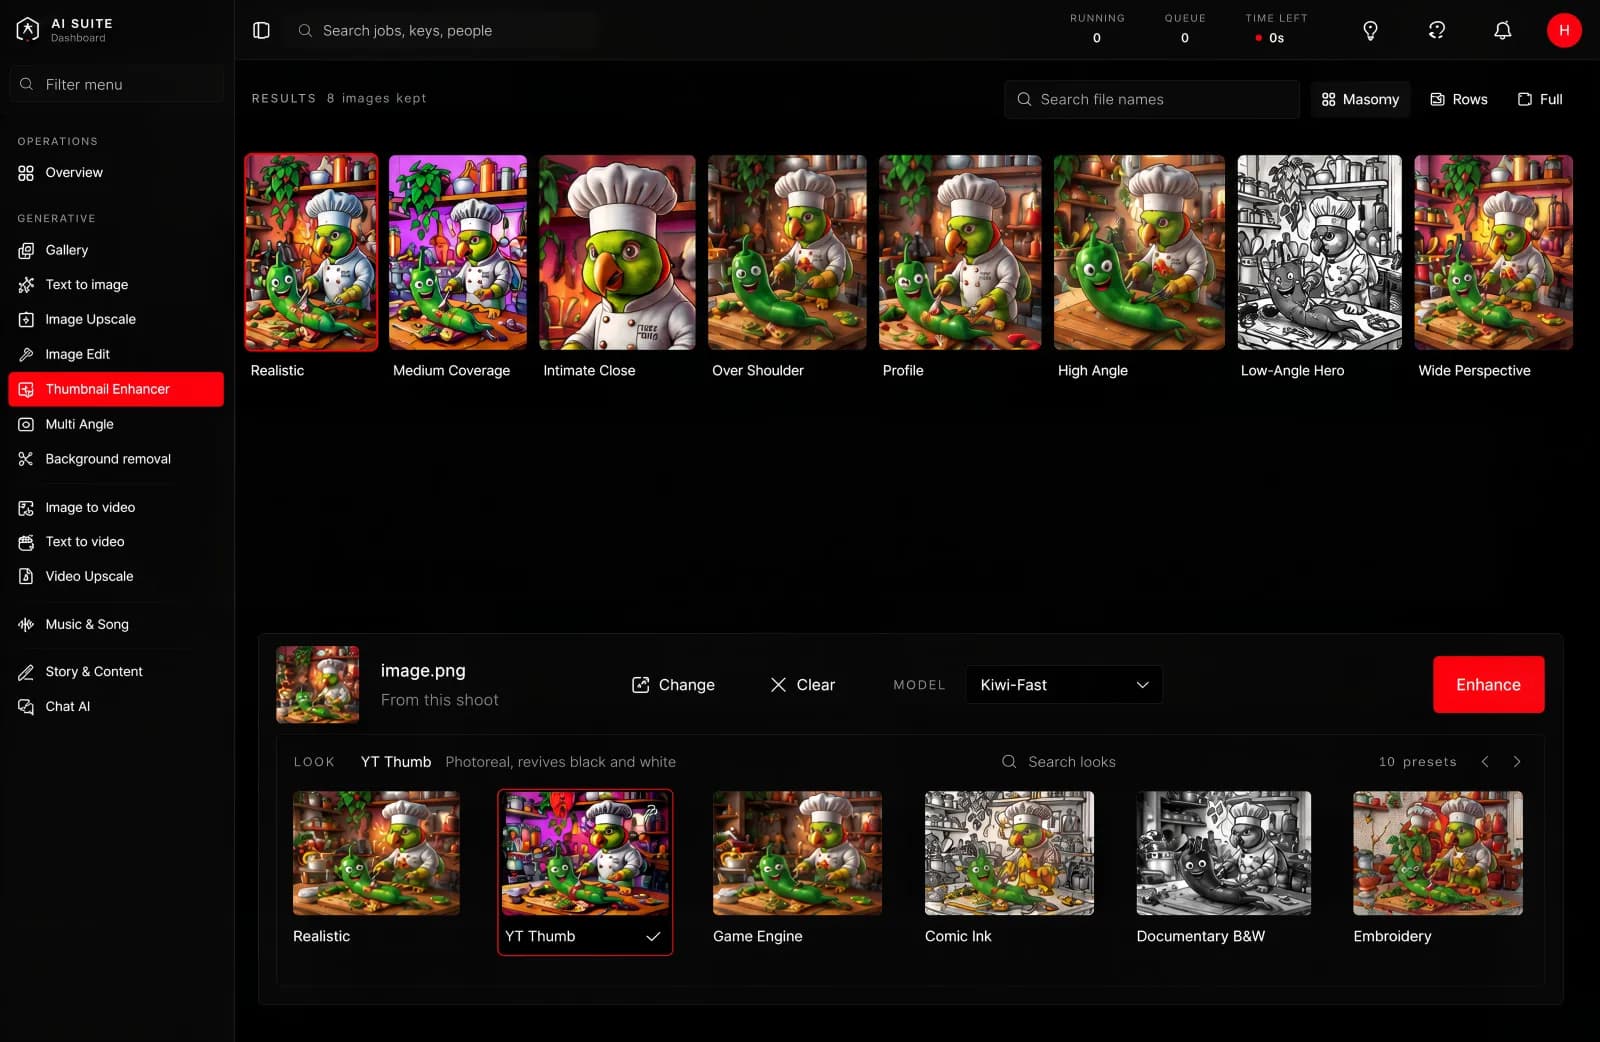
One photograph, six of the sixteen angles. Each comes back in the shape that angle calls for, so a wide establishing shot is wide and a portrait angle is tall.
There is no model to pick here. What you choose is which angles you want,
and the sixteen are named the way a camera operator would name them:
overhead, low angle hero, high angle, intimate close, extreme close,
establishing wide, ground level, dutch tilt, following behind, long lens
compression, foreground occlusion, and the rest.
Two things decide how long a run takes, and both are yours to choose:
A larger picture takes longer than a smaller one.
A longer clip takes longer than a shorter one.
That is the whole rule, and it holds for every tool in the console. The button
quotes you before you press, so you never have to work it out yourself. Change
the size or the length and watch the estimate move.
Asking for more angles is asking for more pictures, so the estimate grows with
the number you tick.
Restyling a frame without changing what is in it. Made for video thumbnails,
where the composition is already right and what you want is a look that stands
out in a feed. It works on any picture.
The picture, and a look. The looks are named for what they are: charcoal, comic
ink, documentary black and white, embroidery, game engine, thumbnail, and
several more.
Two things decide how long a run takes, and both are yours to choose:
A larger picture takes longer than a smaller one.
A longer clip takes longer than a shorter one.
That is the whole rule, and it holds for every tool in the console. The button
quotes you before you press, so you never have to work it out yourself. Change
the size or the length and watch the estimate move.
Run the same frame through three or four looks and put them side by side. For a
thumbnail, the one that reads clearly at the size of a phone thumbnail wins,
which is rarely the most detailed one.
Image to video
Bring your photos to life.
A picture in, a moving clip out.
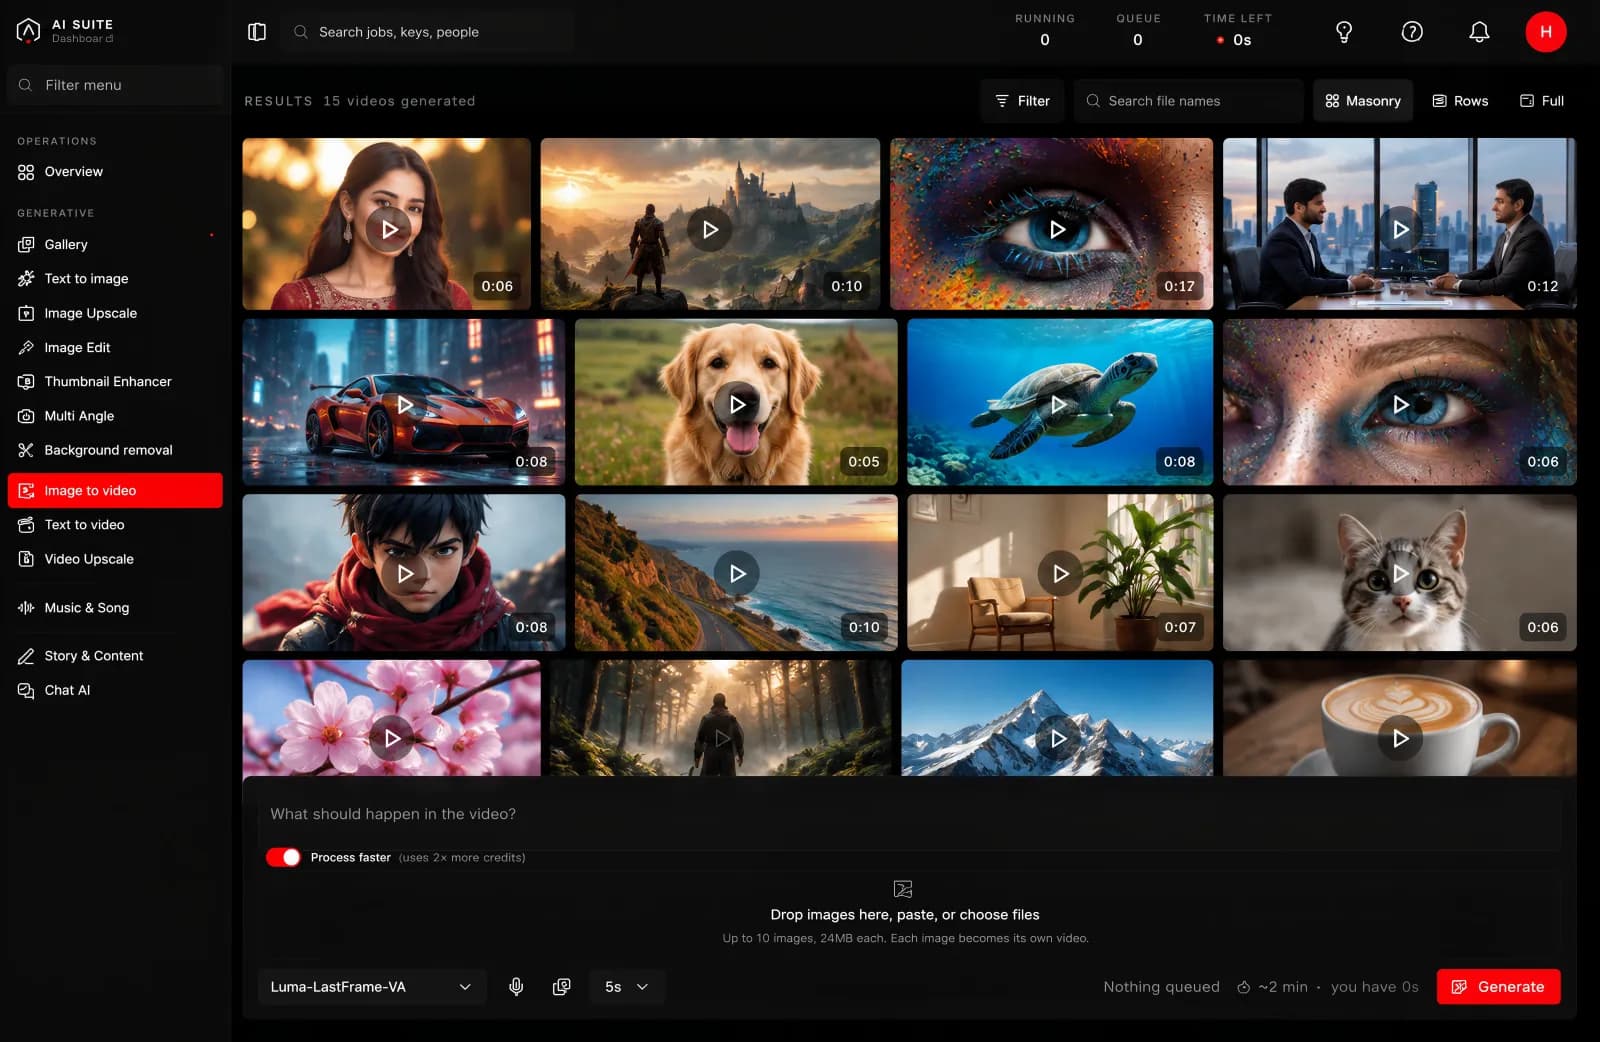
The Image to video page. Your picture goes on the left, the sentence that steers it below, and the model, the length and the Process faster switch on the right.
Turning a still you already have into motion. A product photograph that drifts
and catches the light, a landscape with moving cloud, a portrait that breathes.
The most reliable way to get video, because the look is already decided by your
picture.
The picture. This decides everything about how the clip looks.
A sentence, if you want one. Optional. It steers what moves: "slow push in",
"the fabric moves in the wind". It does not summon anything new. Left
empty, it reads the picture and animates what it finds.
Both video pages carry one switch, and it is the biggest single decision on
the screen, bigger than the length, bigger than the shape.
On (the default): the model runs in its quick mode. Cheaper, faster, and
good enough to tell whether an idea works.
Off: full quality. Measured across the runs behind it, that is about
twice the time, and the cost moves with it. The exact figure for your
settings is on the button before you press, so you never have to guess.
Use it on. Trying a prompt, testing whether a photograph animates well,
showing somebody a rough. Nearly all of the time, on a first attempt.
Turn it off for the one clip you are actually going to publish, once you
already know the prompt and the picture are right.
The habit worth forming is: find it fast, then run it once properly. Running
everything at full quality is the most common way to spend a balance on work
you were always going to throw away.
On this page the switch does one extra thing: with it on, your picture is
fitted inside a smaller box before it is sent. That is part of why it is
quicker, and it is another reason to turn the switch off for the final run,
so the clip is made from every pixel of the photograph you chose.
Two things decide how long a run takes, and both are yours to choose:
A larger picture takes longer than a smaller one.
A longer clip takes longer than a shorter one.
That is the whole rule, and it holds for every tool in the console. The button
quotes you before you press, so you never have to work it out yourself. Change
the size or the length and watch the estimate move.
It takes minutes, not seconds, and the two things that move it are the size
and the length. As a rough shape, measured over five hundred real runs:
A short clip at a feed size, with Process faster on: two to three
minutes.
The same clip at full HD: five to ten minutes.
Fifteen seconds at full HD, at full quality: the better part of an hour.
Read those as an order of magnitude rather than a promise. The spread is wide:
the same settings have come back in a quarter of the usual time and in four
times it, because how busy the machines are counts too. The estimate on the
button is the one that knows your settings, and it is measured from runs of
exactly those settings.
The picture decides the look. If the still is soft or badly lit, the clip
will be too. Time spent choosing the frame is worth more than time spent on
the sentence.
Ask for less motion than you think. Subtle movement reads as expensive.
Large movement is where these tools show their limits.
Faces and hands move less convincingly than objects, cloth and landscape.
Make the still first with Text to image or pick an
angle from Multi Angle, choose the frame you like
best, and only then animate it. If you need the clip larger, finish with
Video Upscale.
Text to video
A sentence in, a clip out, with no picture to start from.
A description in, a moving clip out.
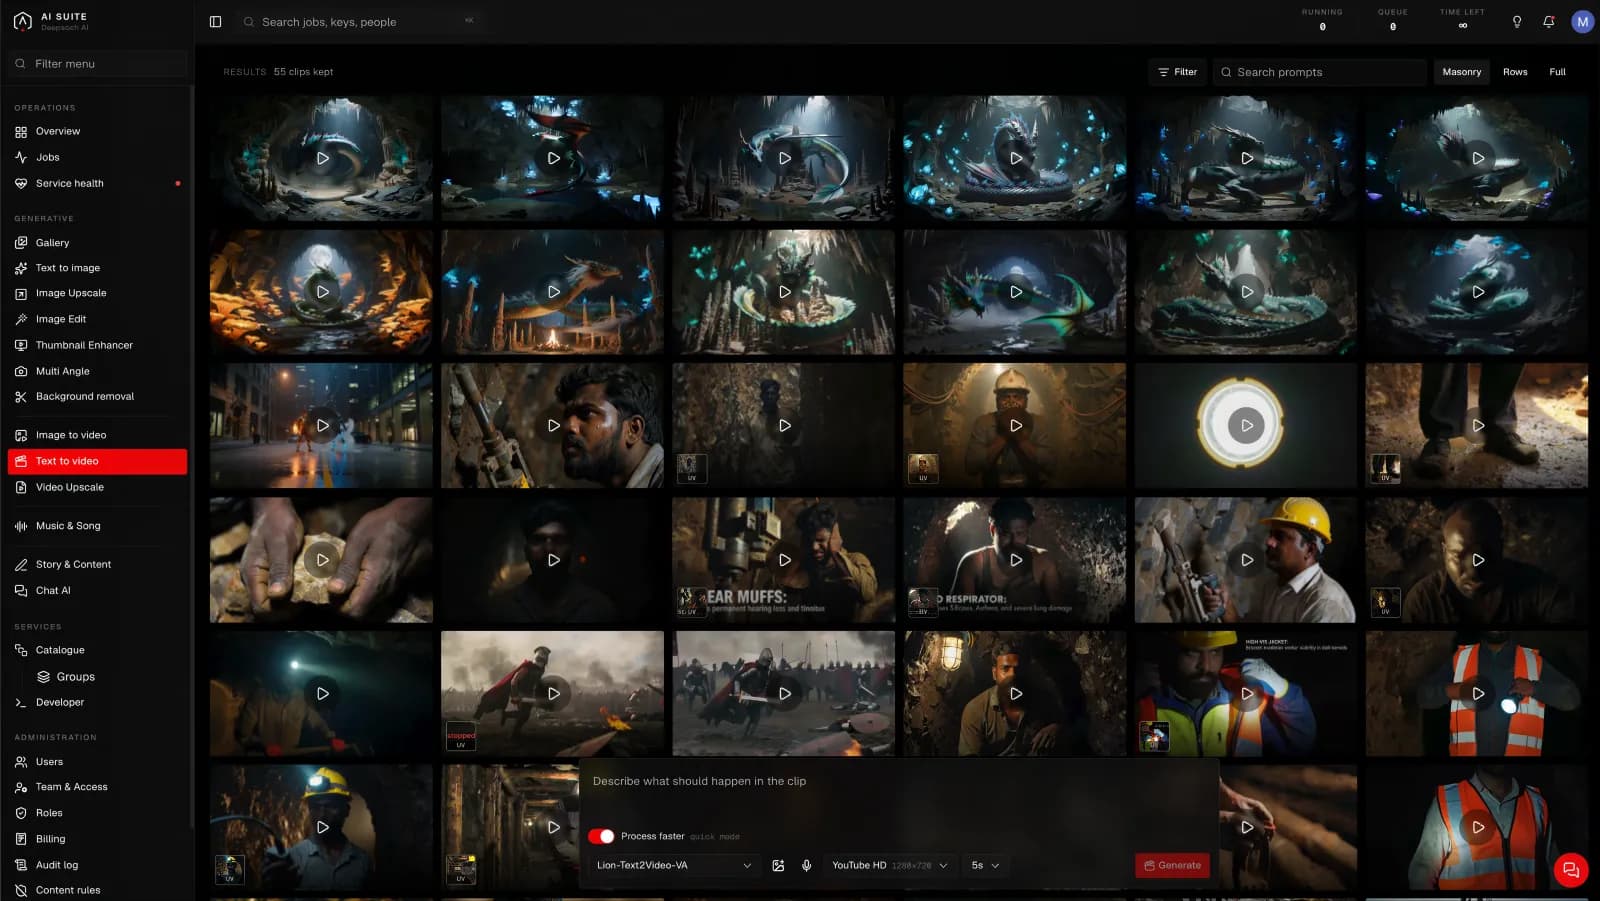
The Text to video page. A prompt, the shape it comes back in, the length, and the Process faster switch.
Makes a clip from a description alone. You choose the shape and the length.
The shapes are named for where the clip is going: YouTube, YouTube HD,
Facebook feed, Reels & Shorts, Instagram portrait, Pinterest, so you pick the
platform rather than working out the numbers. Lengths are 3, 5, 8, 10 or 15
seconds.
Both video pages carry one switch, and it is the biggest single decision on
the screen, bigger than the length, bigger than the shape.
On (the default): the model runs in its quick mode. Cheaper, faster, and
good enough to tell whether an idea works.
Off: full quality. Measured across the runs behind it, that is about
twice the time, and the cost moves with it. The exact figure for your
settings is on the button before you press, so you never have to guess.
Use it on. Trying a prompt, testing whether a photograph animates well,
showing somebody a rough. Nearly all of the time, on a first attempt.
Turn it off for the one clip you are actually going to publish, once you
already know the prompt and the picture are right.
The habit worth forming is: find it fast, then run it once properly. Running
everything at full quality is the most common way to spend a balance on work
you were always going to throw away.
There is no source picture on this page, so here the switch only changes the
mode the model runs in.
Two things decide how long a run takes, and both are yours to choose:
A larger picture takes longer than a smaller one.
A longer clip takes longer than a shorter one.
That is the whole rule, and it holds for every tool in the console. The button
quotes you before you press, so you never have to work it out yourself. Change
the size or the length and watch the estimate move.
It takes minutes, not seconds, and the two things that move it are the size
and the length. As a rough shape, measured over five hundred real runs:
A short clip at a feed size, with Process faster on: two to three
minutes.
The same clip at full HD: five to ten minutes.
Fifteen seconds at full HD, at full quality: the better part of an hour.
Read those as an order of magnitude rather than a promise. The spread is wide:
the same settings have come back in a quarter of the usual time and in four
times it, because how busy the machines are counts too. The estimate on the
button is the one that knows your settings, and it is measured from runs of
exactly those settings.
If you find yourself running this repeatedly to get the look right, stop and
make the frame with Text to image instead. It is
faster, cheaper, and you can see exactly what you are getting before you commit
to the video.
Video Upscale
A clip in, a bigger clip out.
A video in, the same video at a larger size out.
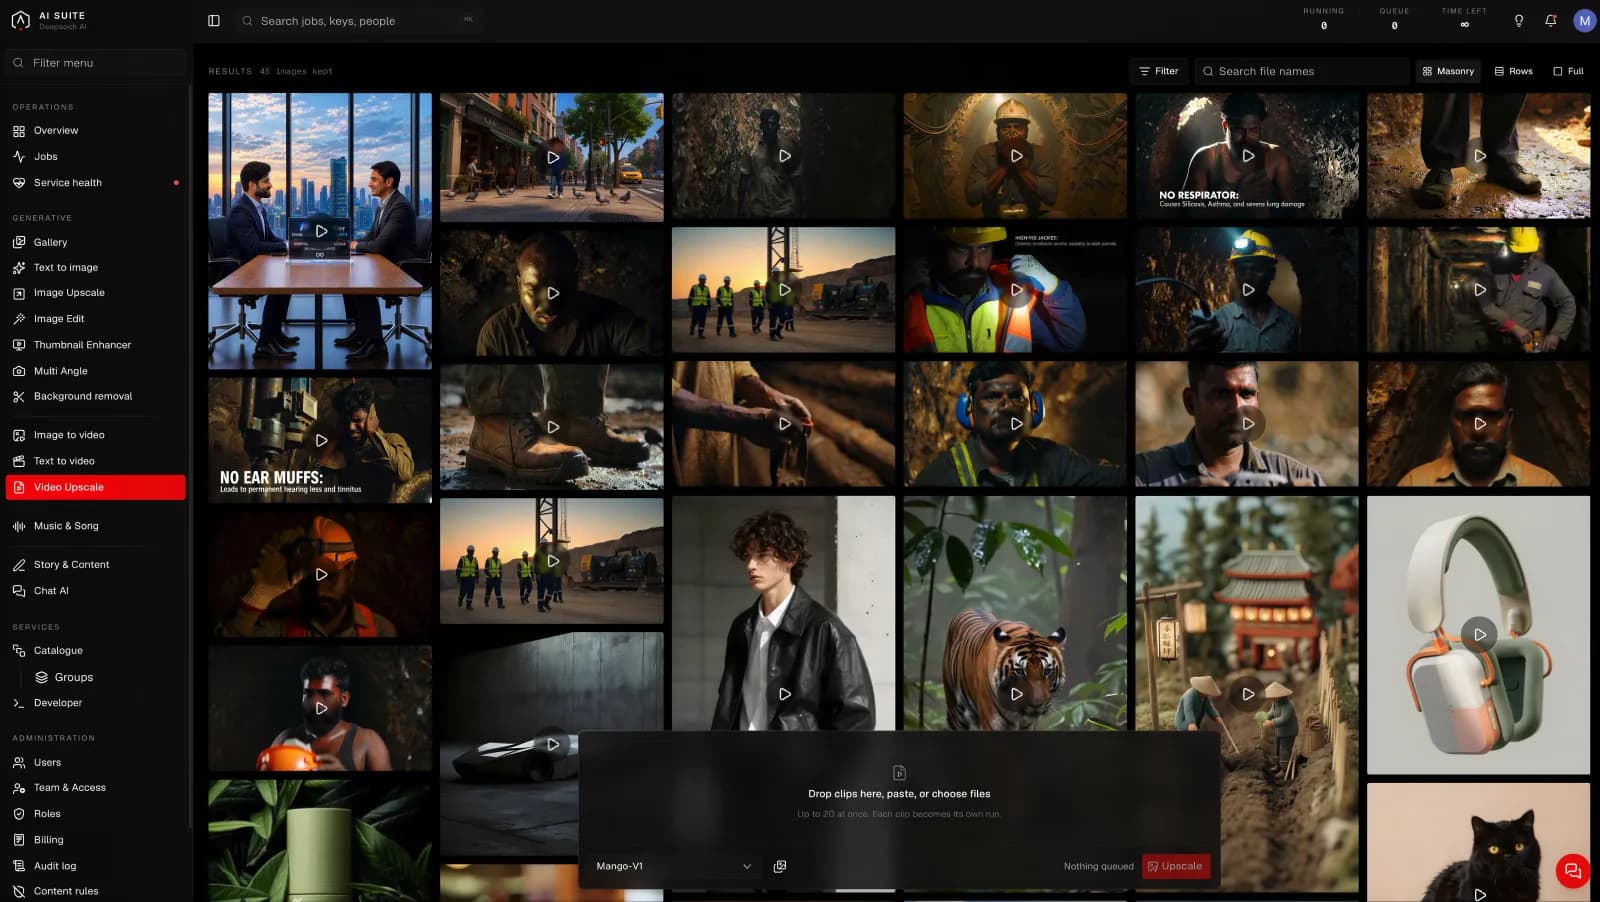
The Video Upscale page. The clip, and the model to rebuild it with.
Two things decide how long a run takes, and both are yours to choose:
A larger picture takes longer than a smaller one.
A longer clip takes longer than a shorter one.
That is the whole rule, and it holds for every tool in the console. The button
quotes you before you press, so you never have to work it out yourself. Change
the size or the length and watch the estimate move.
On this page both apply at once: a longer clip has more frames, and a bigger
clip has more of each frame.
It is doing the work of an image upscale once per frame, so it is the slowest
thing here after a long video generation. Quoted before you press, and worth
starting when you do not need to sit and wait.
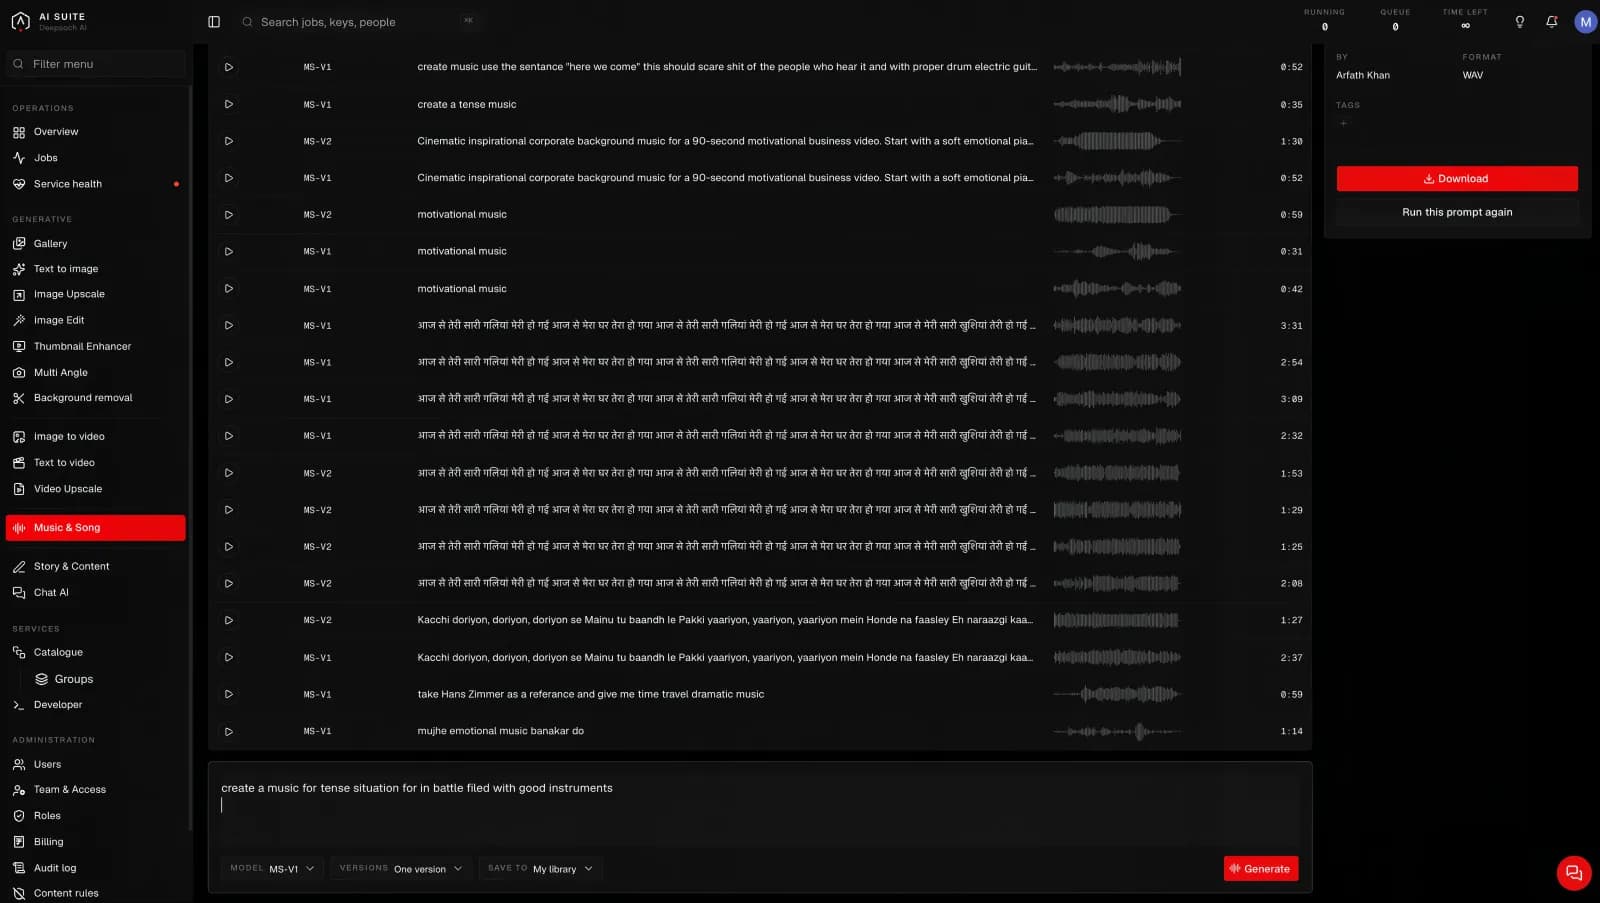
This is the one tool priced per song rather than by the second. You are told
the price before you press and that is what a finished song costs, however long
the machine took. If it fails, you pay nothing. See
What it costs.
Name an instrument, a tempo and a mood, and say what should happen across the
piece: "starts sparse, drums enter halfway, big at the end". Structure is the
thing most descriptions leave out and the thing that makes a track feel written
rather than generated.
Story & Content
A brief in, a shot list out, and the pictures to go with it.
A brief in, a structured story out.
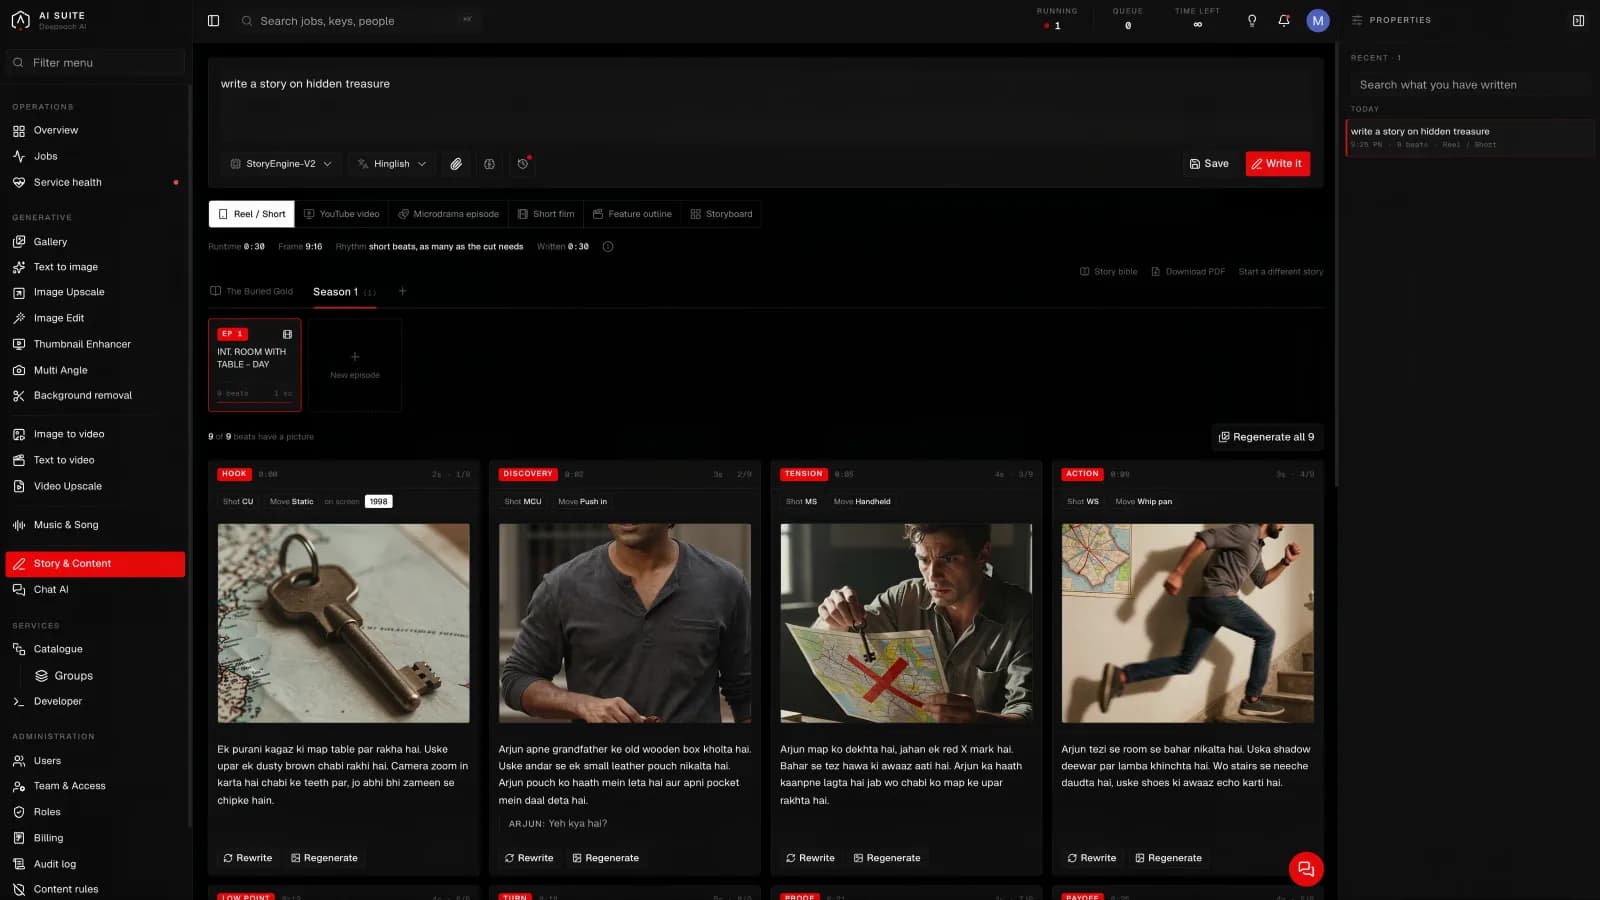
The Story & Content page. Your brief goes in, and the story comes back broken into scenes and shots.
Planning before making. You describe what you want to say and it returns the
thing broken into scenes and shots: what each one shows, in what order.
Useful when you are making a video and need a plan, when you need to show a
client the shape of something before it exists, and when you have an idea but
not a running order.
A story broken into scenes and shots, each described, in order. From there you
can generate the pictures for each shot and take them on into
Image to video.
Work in two passes: get the structure right first, then generate the pictures.
Making images for a running order you are about to change is the most common way
to waste time here.
Your work
Where everything lands, how to find it again, and how to get it out.
You can delete anything you have made. If you close your account, you can ask
for everything to be erased; how that works and what is kept for legal reasons
is in the Privacy Notice.
You can sign in with an email and password, with a Google account, or with a
passkey: your device's fingerprint, face or PIN, with nothing to remember
and nothing to steal.
Passkeys are the most secure option and the fastest to use. You can add one from
your profile at any time.
Each person on a team gets their own account rather than sharing one. This is
not an upsell: it is what makes the record of who did what mean anything, and it
means one person leaving does not mean changing a password everybody knows.
Not everybody needs everything. An account can be limited to particular tools
and particular parts of the console, so you can give somebody access to make
pictures without access to billing or to other people's work.
If a page is not available to you, the console says so plainly rather than
hiding it and letting you wonder.
Your profile shows what you have left, what you have used this period, and what
each run cost. Every charge is itemised against the run that caused it, so
nothing on the bill is unexplained.
Before the console will run anything for you, you are asked to accept the
Terms of Service and the Privacy Notice. If
either changes in a way that matters, you are asked again rather than assumed to
have agreed.
Yes. We claim no ownership of your prompts, the files you upload, or anything
the console returns, and your work is never used to train anything.
Two honest limits. Tools of this kind can produce something that resembles work
that already exists, and nothing here can promise otherwise. Checking before
you publish commercially is yours to do. And two people who ask for similar
things can get similar results, so what you get is yours to use but is not
guaranteed to be unique.
Because that is how these tools work: the same description gives a different
result each time. It is why asking for several versions at once is the normal
way to work. If you want a specific result again, keep it. It stays in your
gallery.
The button tells you before you press, and that estimate is measured from real
runs of the exact settings you chose. Broadly: cut-outs and restyles in seconds,
pictures in seconds to a minute, upscales longer, and video in minutes.
Yes. It is not shared with other customers and it is not published anywhere.
What is held about you, who it is shared with and for how long is set out in the
Privacy Notice.
Ask your account contact. If you found something in this handbook that is wrong
or out of date, say so. It is kept as a set of documents that anybody on the
team can correct.